Friday, 6 February 2009

Crafter...oo Red Treasury

I know I'm part of the Crafter...oo forum but its still brilliant to have one of my bracelets featured in the crafter...oo Red Treasury on Etsy. my Valentine Berries Bracelet is the one featured and its one of my favourite bracelets, made from vibran red jade beads, and my favourite toggle clasp.

In other Etsy news much to my astonishment I sold the lavender rice bag that I listed within an hour of listing it! I'm still totally amazed by that and plan on sewing another one as soon as I can get the dishes done a battle with the dirty laundry goblins, and I musnt' forget to cull the dust bunnies either, they get quite vicious this time of year.

Wednesday, 4 February 2009

Do I look Pretty?

I think Alys looks adorable don't you?

As you can see for the first time since December I have actually got my beading out and have had a play around to create a few pendants and a bracelet. Though for some reason I'm having difficulties making blogger work for me so you will have to make do with two pictures of pendants and one of Alys being a jewellery model. Honestly she is the funniest little cat I have ever had, She was quite happy to sit a pose for a minute but as soon as I took the necklace off she tried to get me and it.

The above pendant is made from vibrant red jade and faceted jet, and the one below is smoky quartz and a single red jade bead. I will hopefully be adding the pendants to my etsy shop and hopefully a few other things over the next few days. For now though I'm frozen and desperate for a hot drink, coffee anyone?

Monday, 2 February 2009

Cinnamon Apple Upside Down Cake

Cinnamon Apple Upside-Down Cake


Ingredients:

cake batter:

½ cup butter
3/4 cup caster sugar
2 eggs
2 teaspoon vanilla
2 cups self-raising flour
½ cup milk


to line the cake tin:

1/2 cup butter (softened)
2 teaspoons cinnamon (heaped)
1/2 cup light brown sugar

2 to 4 firm-fleshed apples (any will do I used pink lady apples)


Preheat the oven at 300 F

In a large bowl cream the butter and the sugar together.

Add half of the self-raising flour, then half of the milk and the vanilla.

Add the eggs one at a time.


Add the remainder of the flour followed by the remaining milk and beat till well blended.

Spread the softened butter in a 13x9x2" sprinkle with the cinnamon and brown sugar.

Pare, quarter, and slice the apples thin. Spread in an over-lapping layer on the bottom of the baking dish .

Pour the cake mixture over the apples.

The batter will be thick and may need to be smoothed on top with a knife.

Bake at 300° to 325° F. for 45 minutes. Until the cake is golden brown on top and springy to the touch.

Leave on a wire rack to cool for 5 minutes. Loosen the sides of the cake with a knife , Cover the cake with a large serving dish or baking tray and turn it out carefully, upside down.

Best served warm or cold with custard, cream, or vanilla ice cream.

Cook's notes: I have made variations of the recipe several times, starting on this post here, which is probably a more amusing read than this one. the most important thing is that you make sure the cake is cooked through (you can cover it with tinfoil to cook for a longer time if its a big cake tin. And that you turn the cake over soon after taking it out of the oven or the cake will adhere to the pan and make a horrible mess, I know. I have split the cake into two smaller tins and stacked them together with a layer of whipped cream as an alternative birthday cake for M.

Sunday, 1 February 2009

warm and cozy


more lavender and rice warm bags
I've been sewing again, more rice bags I'm afraid, I just love making them, it makes me happy to make something that will be warm, cozy, and comforting. M has dragged one up to the framing shop for me to see if they would be interested in having one or two on display. I'm not sure about that, as I doubt my skills very much at this new found sewing lark, though I doubt myself at most things anyway so its no great stretch.
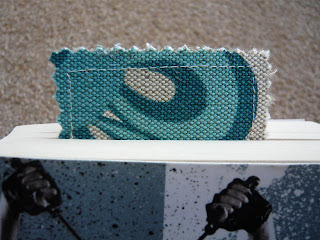
Sorry about the poor quality of the second photo, if the sun ever feels like peeping out from the clouds today I will attempt to get another photo. The fabric is Cath Kidston, a small sample scrap I ordered but wasn't really sure about but I think it looks really nice on the lavender bag.

another one with Cath Kidston fabric (sorry about bad light)


My Dad says I should try and make some ipod covers, which I might but seeing as i don't actually have an ipod (just a quite cruddy Sony MP3 player) I haven't tried yet but I may try and give one a go Monday. What do you think? and would you consider buying any of my sewing items? lavender rice bag or otherwise? depending on how much more sewing I do before my brain switches to something else.

I think its time for a to do list

have a go at making and ipod cover
drag beads out and make at least one bracelet
update etsy shop before everything expires
finish owl design for swap and make it
get thinking cap on for Crafteroo Challenge
2x lavender drawer sachets/door hangers
sketchity sketch sketch
make cinnamon rolls.. (OK that's not really a to do list but someone asked me for the recipe and now I can't get the thought of ooohie gooey cinnamon rolls out of my little brain. )
watch Supernatural (what it can totally be on my to do list)
(along with) drink copious amounts of coffee

and more stuff but I have lost interest in this whole list writing thing as H whinging about wanting cake and balloons and apparently I "HAVE" to watch the end of A Knight's Tale with him for the 10 thousandth time..

Thursday, 29 January 2009

Dark Chocolate Cheesecake Recipe

Dark Chocolate Cheesecake


ingredients:

for the base: 12(biscuits digestive, graham crackers, or chocolate cookies) (makes roughly 1½ cups crumbs)
2 tablespoons melted butter
4 tablespoons caster/white sugar

for the cheese cake:
2 pkg. (250g each) cream cheese

1 cup caster (white) sugar
3 100g bars of dark chocolate 72% cocoa*
2 tablespoons cream (optional)

1 teaspoon vanilla extract

Crush the digestive biscuits and add the melted butter and sugar.

Mix well and press firmly into a 8-inch pie pan or use an assortment of ramekins (6) or glasses.

Pat down using the base of a glass for the larger dish and the back of a spoon for smaller ramekins or glasses. Place in fridge for 30mins to set.

While the base is setting mix together the cream cheese, cream, vanilla, and sugar using a wooden spoon or electric mixer.

Break the chocolate into squares and microwave, stirring every 30 seconds until the chocolate is smoothly melted.

Pour the chocolate into the cheese mixture and mix thoroughly. Spoon the cheese mixture over the base and spread evenly.

Refrigerate the cheesecake for at least a half an hour before serving.

* I used Mark’s and Spencer’s organic dark chocolate, not because I’m posh but because its some of the nicest smoothest dark chocolate you can buy. If you use a dark chocolate that has a lower cocoa percentage you can lower the amount of sugar it the recipe, its all a matter of personal taste.

cook's notes: The recipe is true to what I mixed together in my experimenting on Sunday night. The cheesecake was dark rich and smooth. I must admit that I prefer and no bake cheesecake to a baked one.. but it could just be that I'm lazy. There is one small ramekin in the fridge for M's pudding tonight which I'm sure he will like because he adores cheesecake.

---------------------------------------------

edit: slight edit, the vanilla disappeared on me. have re-added it to the list of ingredients. and blogger is being wierd about spacing again.

Tuesday, 27 January 2009

movies and tv

Today I have cleaned the whole house top to bottom. Or at least hidden the mess so you can see it. Blueberry muffins are cooling on the wire rack and I have sewn two lavender and rice warm bags. I have no pictures at the moment to show you as M has taken one of the leads to Austria and I can't find the other lead to let the camera talk to the computer and so on. But there will be posts with pictures soon.. and a new recipe for dark chocolate cheesecake that I threw together Sunday night.

I served the cheesecake and some homemade pizza to some girlfriends that came over to watch a DVD. What DVD you ask, Pineapple Express, not the sort of film I would go see at the theater but it was stupid and funny, and we had a laugh watching it.

As M is away until Wed night I also rented a The Happening, and Skin Walkers. The happening was well crap in the magical M. Nighty Night Shamalan no answers, only questions and completely dissatisfying. Skin Walkers was pure cheesy horror, (BRILLIANT)a few twists on the usual werewolf legends but it was fun to watch. Loved it, guns, werewolves, and the guy that was the emo alien kid in that Roswell tv show. Though all grown up, beefy arms and guns ablazing, and not an emo alien pout to be seen, though definitly high on the angst o' meter.

I have also watched the first episode of Supernatural Series 4! Love love love that show. Its great, great music, monsters, mayhem, Sam and Dean, moody lighting, sarcasm, geekage, Dean and Sam, the Impala, pie, and coffee! Watching the second episode Thursday as forgot to sky+ it and I missed it on Sunday. p.s. don't tell M I watched it as I wasn't supposed it watch it without him. shush its a secret...

more craftiness and baking to ensue shortly... right now I need coffee and a blueberry muffin, for I have no pie.

Saturday, 24 January 2009

Paper Heart Tree

sewn paper heart tree

Remember the paper hearts I was busy sewing a few posts back? well here they are as part of the studio's window display. These photos are from the side view as I couldn't get a decent shot from the outside due to the reflections on the glass. The twig tree lights up and I bought it for the studio Christmas display three years ago and I still love it and keep thinking about taking it home.
paper confetti

I'll try to badger M into taking a proper photo of the display when he gets back from his trip to Austria to shoot a wedding in the snow. Why oh why am I not going? Because H has school and we are already taking him out for 6 days of term time in the spring to fly to Seattle and drive to my parents in Idaho from there. All I have to say is he better bring me some sort of souvenir back. But at least it give me the chance to have the girls around for crafty chatter, coffee, and cake.
If you look at the top left corner of the first photo you will see a dapper little chap with a raggedy cat, that little boy is H when he was only little. Cute wasn't he?
--------------------------------------

etsy crafteroo treasury

oh and I forgot to tell you that my Ophelia bracelet made it into the crafteroo etsy treasury the other week. Its still available in my etsy shop if you want to take a look.

off to pack M's suitcase.

Friday, 23 January 2009

twitterpated

I have succumbed, I started tweeting a few days ago... its much easier than blogging or trying to finish my abandoned fairy tale.

Thursday, 22 January 2009

Wolf and Apple Tree bookmark

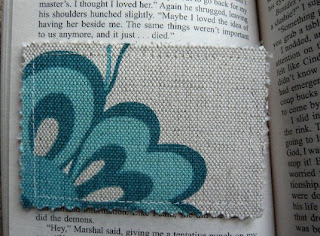
sorry the photo is such bad quality the light has been nonexistent today, until about 30 seconds ago anyway. Its another small bookmark similar to the one I made in my mini bookmark tutorial. Its made from a small piece of the lovely Red Riding Hood fabric Selena sent me in the Fairy Tale Swap last summer, with some cotton/linen blend fabric on the back (which I forgot to take a picture of). Its cute though and currently marking a page in a craft magazine.

Now I have an Ikea storage unit to build, and wade through the horrible disaster zone that is H's closet. Wish me luck or call for help if I don't resurface for a day or two.

Owlish Love...

owlish love postcard

Don't worry its not for the Owl Swap, just and experiment with mixed media.. and because I have Owl's on the brain well here he is. I think he look really cute, except for some rather wonky stitching. I bought a packet of 20 deckle edge recycled rag cotton postcards about six months ago and it has languished in a craft box ever since. That is until a few days ago when I was messing around with sewing paper hearts and thought I would try to make an owl too.

The owl is made from a vintage book page from Alice through the Looking Glass, if you look closely you can see "Alice" and "Queen" in the writing, his feet and outline are ink pen, and the heart is a scrap of raspberry gingham from my scrap box. I have 19 postcards left so I may have another go later and see what I can come up with. If I'm very brave I might even put one up in my somewhat abandoned, slightly dilapidated (I love that word) etsy shop.. *attempts to brush cobwebs away and hide small dead bodies under carpet*.... if anyone is intrested..

Wednesday, 21 January 2009

my crafty space


I took this picture a few days ago to share with you all. Its my crafty space... a bureau from Ikea. I have finally given up on the box room to be my crafty space, M thinks we could still share a desk but in reality that would never work because I would have half finished projects dotted about the big desk and he would want to do his picture editing after a wedding and it would be a train wreck in the making.
So last week I shuffled most, but not all, of my crafty things into the bedroom to reside in and around the bureau.
a few items on the desk
a Starbuck's coffee cup (of dubious acquisition) filled with paint brushes
a cup of coffee, filled with er coffee
dinky sewing machine
toadstool painted page
basket full of inspiration (books and magazines)
sketchbook on the go
various tubes of paint and some prepped music sheets
my plush owl prototype
if you look at the very far back of the desk and squint a bit you will see a needle book and pin cushion from AnnieB, a little clothes peg doll from Hope (which I still haven't blogged about as I'm so behind on posts). It needs work and a few more cosy details but seeing as we haven't even decorated in the bedroom yet we will get round it sometime soon.
so what does your crafty space look like?

Saturday, 17 January 2009

Toadstool ricewarmer

rice and lavender warm bag

With sorting out the Owl swap I haven't had a chance to blog about any of the other things I have been making in the last week or so. I admit I haven't made a lot as I have felt seriously unmotivated to get anything done but I have dabble in a few things besides the paper hearts from a few blog posts ago. I have made these two beautiful warm bags, the top one was made with a scrap of adorable toadstool fabric that Anna sent me last summer that I have been hoarding away for the perfect project.
My sewing is improving slowly, and I am seriously considering ordering some fabric and one day accumulating a small fabric stash. For now I'm happy with my little scraps and bit of blue fabric from Laura Ashley that I bought with some specific presents in mind, the rice and orange oil warm bag below being one if them. It was a present made for my friend Lou's birthday last Friday. I dropped a few drops of orange oil onto the rice because I had run out of lavender, but the orange oil smelled lovely and I hope she gets some use out of it after her hockey games.

rice and orange oil warm/cool bag

I should be working on making owlish things for the owl swap, and though I have some ideas spinning around in my brain I haven't even cracked open my sketch book yet. At the moment H is watching another episode of Ruby Gloom which is the most fantastic little show for little gothlets in training, and for you inner goth. Its brilliant, with the cutest theme tune, you must watch it... I want to make some sort of ruby gloom crafts.

*wanders off singing ruby gloom*

Wednesday, 14 January 2009

Owl Swap Partners

and the Owl Swap Partners are as follows:

Chloe and Hannah
Sara and Cindy
Laurie L. and Jamie
AJ and Kiva
Valerie and Izabela
Hope and me


a last few swappers paired up.

Monique and Sherry
Ani and Karen
Janine and Lindsey

I hope everyone is happy with thier partner, tell me if there is anything that needs shuffling around.. if you have had the same partner on another swap. I hope everyone is paired with someone new. And I really hope I haven't forgotten anyone. but there is the possibility of that too... I'll try and get e-mails sent out today and tommorow with everyones details swapped over. But in the meantime you can do a bit of blog stalking on your partner's blog and everyone elses too!

Paper Hearts

this is what I'm working on today. I'm making some sewn paper hearts for the window display at the studio. Hopefully they will be hung on a white twig/tree that was the Christmas tree a few years ago. I have painted one of the paper hearts red and I'm waiting for it to dry while I type this up fishing for comments and opinions.
The colour is a bit off as the light is abysmal, foggy and grey, but I think they look quite pretty, I don't know what M will make of them. I'm leaving the Owl swap until this afternoon as a few emails keep landing in my in box. I hope everyone is as excited about the swap as I am.

Owl Swap Update II

roll call of Owl swappers

Vonnie
Katy
Gill
Kerry
Anna
Miss Crafty
Sam
Laura
Chloe
Leah
Ali
Rebecca
Becky
Nikki
Karalea
Megan
Jill
Heather
Cornelia
Cindy
AJ
Sara
Jessica

Ngaire
Kiva
Yvette
Rosina
Karly
Valerie
Laurie L. (no blog at this time)
Marcel
Jamie

Kitty

AnnieB

Izabela

Hope

Hannah

oh and me too! that makes 38 swappers.


if I have forgotten you please tell me so!

still waiting for emails from: Ethel and Edna's tearoom, and one or two others.

I'll set up a flicker group too in the next week so when we have finished all our swaps we have somewhere besides our blogs to show off our lovely Owlish things.

Thursday, 8 January 2009

mini bookmark tutorial

gift card sized bookmark

An explanation first, in case you think I might be turning mad. I love gift cards, not necessarily to be given them, although there is nothing nicer than having a fully loaded card for a bookstore in my hot little hands. I mean I collect them, every time we go to the states, I'm sure as a family we must have boxes full of empty gift cards, I love them they make perfect bookmarks for paperbacks as you can not only mark the page but mark the sentence or paragraph you left off at. But the cards I have mean something to me, from my favourite places and shops. I have ones from the Flying Goat coffee shop in Santa Rosa, The First Starbucks in Seattle, Bloomingdale's in San Francisco(one of which I gave to Katy, as she understands), and countless Old Navy and Target cards.
I have even converted M and H. H adores having cards for all his favourite places in the states, mainly IHOP, Old Navy, and Starbucks, and M has a very special Starbucks personalized card that I had a friend order for me to give M for his birthday last year, he keeps it in his wallet all the time even though there is no money left on it. As I love the size of the cards as bookmarks I thought it would be fun to make a fabric bookmark the same size as a gift card with a few scraps of fabric I have in my little fabric scrap box, a quick project to use up any small scraps of fabric that are too good to throw away.


mini bookmark tutorial

materials:

fabric scraps
interfacing
needle and thread or sewing machine
pinking shears


1. Start by cutting 2 small pieces of fabric a 1/4 inch larger than a gift/credit card.

2. Cut 2 pieces of interfacing the same size as the fabric. And following the instructions iron the interfacing to the back of both pieces of fabric.


3. Place pieces together, with the right sides facing out, and stitch about a quarter of an inch away from edge all the way around the fabric.
4. Pink along the edge of the bookmark with your pinking shears.

5. Mark your place in your book with your new bookmark.
alternatively you could add ribbon or embroidered details to your bookmark. I hope you found a little inspiration from this quick craft idea.

(don't forget to sign up for the Owl Swap if you are intrested)

Wednesday, 7 January 2009

Owl Swap


Firstly thank you everyone who has expressed an interest in an Owl swap. Its really cheered me up after a dismal few days.

I love owls, I have been obsessed with drawing, painting, and now sewing my little Owl creation. I have loved owls because they have always been associated with magic and moonlight. And how badly did I want the mechanical owl Bubo from Clash of the Titans when I was a kid?

The Owl swap is an international swap, so you must be willing to send your swap across the globe. Please budget around $10 to $20 for the swap. The swap should include at least one handmade object, one treat (to break our diets on these bleak winter days) and one bit of craft material (fabric, buttons, pens) whatever you think your partner might like. Any craft allowed, fabric arts, jewellery making, painting, card craft, bookbinding, pottery....

The swap sign up will be open for one week, until next wed the 14th of January. And parcels must be posted out by Valentine's Day the 14th of February. Please leave a comment on this post and e-mail me the following information to meridianariel @ hotmail . com

Name:

Address:

e-mail:

blog:

a little bit about yourself:

your crafts:

favourite treat:

that should do it but let me know if you have any questions and I will answer them as best I can. thank you!

Monday, 5 January 2009

Sugar Scrub

Orange Vanilla Sugar Scrub


ingredients:

1 cup demerera (raw cane) sugar

2-3 tablespoons almond oil

1 teaspoon vanilla flavouring

1 teaspoon orange (or any other flavour) essential oil


1 glass or plastic jar with a lid, the one I used came from Ikea, but any jar with a lid will do, even an old jam jar.

mix all ingredients in a glass bowl (plastic will absorb the oil) until you have a nice slightly slushy consistency and then scoop it into the jar.

Apply the scrub to hands or feet (or any area of rough skin) in the bath or shower, rinse.

cook's notes: I made the sugar scrub as a Christmas gift for Frizbe, but I used a small amount to test the scrub before giving it away. It worked really nicely on the backs of my hands and made my skin feel really smooth.

I know there are a lot of different recipes for sugar scrub out there, some with vitamin e oil, olive oil, salt, coffee (apparently), and other flavours and stabilizers but this is the one I used and tinkered with. I just kept mixing and adding a few drops of essential oil and vanilla until it smelled delicious and felt like a nice consistency. There are more recipes on recipezaar, angry chicken, or just search for it on google.

I had been wanting to make some sugar scrub for years and for one reason or another I just never got round to it, I bought all different ones from various shops (mainly boots, and I used to love one that they made at Bath and Body Works long long ago) and was never 100% happy with them. Next time I may try to do a rose or coconut scented sugar scrub, when I have more than just icing and caster (white) sugar in the house for baking. Or I must just go make some brownies now and forget all about sugar scrub.

Sunday, 4 January 2009

owl swap anyone?

OK blogger is evil I can't load any images again today so I'm calling it quits but before I log out I just wanted to mention my idea for doing an owl swap, and wanted to know if anyone would be interested in participating? if so then I will do a proper write up tomorrow while the boy is at school and M is at work and I have a lovely tidy and quite house for a short while.

and after that i have a few more ideas up my sleeve for future swaps...

Saturday, 3 January 2009

Happy New Year

Happy New year...well a few days after the start of the new year anyway. I have been busy keeping H busy, mostly with playing Star Wars Lego on the DS, and avoiding going out for a ride or walk in the cold with M. Its not that I don't want to walk, I like to walk but I don't like being forced to and all I wanted was to curl up by the fire and read my books, and take all the Christmas decorations down and shove them into the attic and shift about some furniture here and there.


Resolutions? Well I did make a few, of the lose weight, get fit, go on a diet variety.. as well as working on my writing and finishing off that Poison Apple Tree fairy tale I started but haven't had a chance or the motivation to finish yet. and the hope to continue on my crafty path and learn more crafty skills.


Aftermath? Christmas was really good despite getting a cold that seemed to never want to leave and some of the things I wanted to do never got done (mainly baking) but in the end I was happy that everything went well. All my handmade ornaments and rice warmers were received gratefully so I didn't need to worry about them as much as I did. H loved his Owl bed warmer and told M he was never going to ever use the old plaid one again. I felt all warm and fuzzy inside .

I'll post some pictures soon but blogger is hating me at the moment.

Wednesday, 24 December 2008

Merry Christmas


Its been a busy week recovering for coughs, colds, and flu... and frantically trying to make presents, wrap presents, and go shopping too.. the fridge is full to bursting, the cupboards full of chocolates, cookies cooling on the rack and fresh reindeer food in jars to set out for Santa to take to his reindeer.
Thank you to all my readers, my lurkers, my friends. Thank you to all the people that I have met through blogging and crafting, through swaps and crafter..oo. Its been lovely to meet you, e-mail and leave comments back and forth, since last Christmas I have learned to make jewellery (some of which I have even managed to sell) I have learned to embroider (slowly), and to sew (with a little machine no less) my life has changed for the craftier! Though I still knit quite badly
I wish you all the best this holiday season! I have cookies to bake now (chocolate chunk), and poor H has fallen asleep beside the fire next to Alys the cat... its all a little too much excitiment for him.
feel free to pop by for a coffee and a cookie! Merry Christmas Everyone

Saturday, 20 December 2008

lavender and rice warm bags


lavender and rice warm bags


I would probably call them heat-y bags as that's what we call H's warming wheat bag. I made these with a bit of "help" from H, for his great-grandmother and for his grandma too... they are made from some Laura Ashley fabric that any grandmother or great-grandmother would love. Probably a little wonky in places due to my less than exemplary sewing skills but they look nice and smell like lovely. They can be warmed in the microwave or popped in a bag and chilled in the freezer.

They were quite simple to make even with my sewing skills and that makes two more presents to pop on the ever growing pile of wrapping I have to do later. After I have been shopping later today to get all the things I have been too sickly to sort out during the week. Luckily we are all on the mend so its going to be very busy these next few days before Christmas. If I have a chance I will blog a few more Christmas-y recipes and maybe a few more crafty things too before I put away my scissors, my pliers, my pens and just wear an apron and carry a wooden spoon in hand constantly. Tis the season after all...

Tuesday, 16 December 2008

Luxury Granola (aka reindeer food) recipe

Luxury Granola (aka reindeer food)

Ingredients:


2 1/2 cups porridge oats

½ cup flaked almonds

1/2 cup desiccated coconut
1 teaspoons cinnamon

1/4 teaspoon salt

1/4 cup maple syrup
3 tablespoons melted butter (margerine)

1 teaspoon vanilla extract
3 tablespoons light brown sugar

¼ cup raisins
¼ cup dried cranberries (sweetened)
3/4 cup plain chocolate chips (optional)


Pre-heat the oven to 300F (150 C)
Combine all the ingredients in a large bowl, mix thoroughly and place in a single layer on a non-stick baking try ( if you don’t have non-stick then you will need to grease the baking tray with butter or oil).

Place in the oven for 25 minutes or until golden brown.

Every 5 minutes you will need to open the oven door and stir the granola mixture.
Cool completely and add the raisins, dried cranberries and chocolate.
The granola can be eaten on its own, or with milk for breakfast, sprinkled over yogurt or ice-cream, and of course left out on a dish for Santa’s reindeer on Christmas Eve.

--------------------------------------------------------------------------
A little help for those who don't use cups as measurements. Oh and for the record I just use normal everyday teaspoon and tablespoons for measurements, less hassle than attempting to locate the measuring ones. Which I think have migrated to H's toy box.


U.S. to Metric Conversion Table
1/5 teaspoon = 1 ml
1 teaspoon = 5 ml
1 tablespoon = 15 ml
1 fluid oz. = 30 ml
1/5 cup = 50 ml
1/4 cup = 60 ml
1/2 cup = 120 ml
1 cup = 240 ml
2 cups (1 pint) = 470 ml
4 cups (1 quart) = .95 liter
4 quarts (1 gal.) = 3.8 liters


Cooks Notes: The recipe is mine based on several granola recipes that I found on the Internet and was quite disgusted by the amount of salt, and vegtable oil used in them. In the end I ignored the recipes I had found and experimented with what I thought of as Christmas-y tastes: dried cranberries, cinnamon and brown sugar.
It smelled devine and tasted great, I kept nibbling on it as I added the dried fruit and baked the second half of the batch. I gave the granola out as gifts last Christmas and may do the same again this year when we make some that is. Both H and I have been poorly with cold and fever and haven't had the chance to do any Christmas baking just yet but we will be. H keeps asking to make Reindeer Food and this is alot better than the kind with glitter in.

Saturday, 13 December 2008

cupcake snowman recipe


ingredients:

cupcakes:
Ingredients:
2 1/2 cups self raising flour
1 ½ cup caster (white) sugar
1 teaspoon baking powder
2 eggs
1 teaspoon salt
1/2 cup butter (softened)
1 cup milk
3 teaspoon vanilla extract

Preheat the oven to 350 degrees F (180 C).
Grease 12 cupcake cups or line with paper muffin liners. (recipe makes 24 cupcakes (not fairycake size, muffin tin size.)
Sift the flour, baking powder, and salt into a medium bowl and set aside.In a small bowl mix the milk and the vanilla.

In a large bowl cream butter and sugar until fluffy.

add half the flour and mix well. Add half the milk and vanilla mixture.

Add eggs, one at a time mixing well. slowly add in the remainder of the dry mixture.

Add the last of the milk and vanilla.

spoon the batter into the cups and bake for 15 to 20 minutes, until the cake springs back when touched.

Remove from oven and let cool for about 10 minutes, then turn out of pan and onto a rack to finish cooling completely.

Vanilla Cream Cheese Frosting
ingredients:
1 (8-ounce) package cream cheese, softened
1/2 cup unsalted butter (softened)
1-1/2 cups powdered (icing) sugar
1-2 teaspoons vanilla extract (flavouring)

Place the cream cheese, butter, and vanilla in a bowl and slowly add in the powdered (icing) sugar as you mix. Blend until smooth.

decoration:
1 large bag of plain m&ms
1 industrious child to separate the m&ms ( you only need the brown and orange ones so bribary is easy)
sweetened and tenderized coconut
1 bag plain chocolate chips


assembly:

place the sweet coconut in a bowl
ice a cupcake with the vanilla icing and gently dip the cupcake into the coconut.
use the brown m&ms for the eyes and the orange ones for the nose, and chocolate chip (coal) for the snowman's smile. Its a fun job that the kids can help you with, especially seperating out the m&m colours, as H quite happily sat for an unheard of 10 minutes sperating out all the m&ms and was quite happy to steal a few.

alternatively you could use other orange sweets for the snowman's nose or colour some marzipan orange and roll flat and cut small triangles (carrots) or roll into small carrot shapes.

cooks notes: I made two batches 48 cupcakes to sell after H's school Christmas Concert. every single cupcake sold at a £1 each, M assures me they were very nice I never got one though I may have made myself just the teensiest bit sickly "tasting" the icing....and cake batter... I also made 2 trays of brownies (recipe soon) which all sold out as well, so I was quite pleased that even if my jewellery wasn't selling my cakes were appriciated and raised some money for H's school.

all cupcaked out

been busy making these for two days.... huff puff more later..

Thursday, 11 December 2008

illustrated ornaments

a little toadstool
I have been having a play around with making a few more scrap fabric ornaments for gifts. This time with more illustrations done with permanent ink on a plain linen blend fabric. I ironed (shock horror) the doodles to set the ink, though not fabric ink this time just several art pens I have kicking about the house, well not actually strewn about the place, that would be too messy they are tucked away safely in a little blue zippered pouch with Russian dolls machine embroidered on them by the very talented Anna from the Russian doll swap ages ago... though for some reason I can't find where I blogged the pictures.. hmmm blogger being evil again I assume.
a cup o' joe for M

Hopefully M isn't snooping on my blog, he doesn't visit very often anyway so I should be OK to blog this little coffee cup ornament that I made for him.. its only going to be a glorified tag on his present but still its nice to keep some secrets for Christmas.


a little pug for my mother

I posted the pug ornament off to my parents yesterday so I doubt it will make it to Idaho before Christmas but one can hope. all set for Christmas? er no not really but I'm trying to be.. though I think I'm getting a cold which is just what I need in the two weeks before Christmas.

an owl in a tree

This little owl in a tree is my favourite, its from a quick sketch I did while at a abysmal fair after I had exhausted my supply of beads to make more jewellery and it was better to draw something than to sit twiddling my thumbs. I best get going now I have brownies in the oven and they need checking then I have snowman cupcakes to make... I may blog the recipes later in the week!

Monday, 8 December 2008

Its beginning to look alot like...

o Christmas tree

....well you know how the rest of the song goes! We got the tree up yesterday, its crooked but H picked it and is very happy with his choice. He put about 5 ornaments up then scarpered with a small box he filled with all the fabric ornaments I made last week. Five minutes later he returned triumphant that he had place a fabric ornament on every door in the house to make everything suitably Christmas-y. Alys and Starbuck (the cats) glare at the tree as if its some monstrous intruder into their domain... well Starbuck looks like that at everyone so its nothing new. Alys retreated to the relative safety of the rumpled up duvet on the bed, safe from the menace of sparkly trees.

scrap fabric ornament

We went to a birthday party for H's friend over the weekend as well, and I made the little Lamb ornament to go with a Christmas card I sent along with a birthday present. My friend's last name is Lamb so I thought it would be perfect to doodle a lamb onto one of the fabric ornaments I have been working on. And now apparently need to make more as I dare not take them off the doors or there will be serious upset from the boy.

doodle button pins
Last week I had this idea to draw/paint some little faces on some fabric buttons, on brooches/hair pins, and Sam helped me by quickly sending me a batch of buttons I ordered. They are meant to be a present for a friend's daughter but I ordered more than I will be giving out. They have turned out pretty good I think.. except for an owl I did on some white fabric (the pen bleed and made a hell of a mess on the white fabric). Your can see my original doodles for the project on the picture below. I have another 5 buttons to doodle on, and the owl disaster that needs fixing ( I will try to paint over it and see what happens) though they don't have homes to go to yet.

pins and original doodles

Thursday, 4 December 2008

bad owl

hmmmm... not sure if this has worked out right or now.. its meant to be a little owl shaped rice bag for H. For Christmas... I'm just not sure.. I want it perfect and today is one of those days when everything is far from it. I will tuck him away and see if he is stilll a bad little owl in the morning.


hmmmm....

Wednesday, 3 December 2008

Scrap Ornament Tutorial

scraps and samples collected from various places Ikea, and Laura Ashley


ahem


materials:
an assortment of fabric scraps
garden twine or ribbon
needle and thread or sewing machine
poly-fil
(buttons, fabric pen, beads, paints optional)


step 1:
you will need two pieces of fabric the same size ( I didn't measure anything I jsut went by what little scraps I had to hand) and a small piece of twine/ribbon. I used gardening twine from a garden centre but you may wish to make fancier ornaments than me.

step 2: Put the fabrics together facing each other and place the twine/ribbon between them. You may want to hold the fabric and twine in place with a needle or two. Sew along the left side the top (careful of the twine) and along the right side.
Step 3: carefully turn right side out, pressing out the corners, with a chopstick or knitting needle. Fill the ornament with poly fill (if you wish you can add dried lavender, or cinnamon to make the ornaments smell lovely.

step 4: Fold the ends of the material in and hold them with more pins and sew along the bottom of the ornament.

Its not a complicated tutorial because my sewing skills are decidedly advanced, there are a lot of different techniques you could use, you could sew an ornament with the right side out and then crimp along the edges with pinking shears (I don't have any) add buttons, or embroidery. The owl and the quail I hand drew with a fabric pen, ironed it to set the ink and I think they look quite special. I will be giving these out as Christmas gifts as well as decorating our Christmas tree with them.

If you have any questions I will try my best to answer them, and if not I will point you in the direction of someone who can. Its a fun way to use up little scraps that might otherwise sit about in your scrap box feeling unloved and cross breeding with rogue dust bunnies. My scraps and samples have come from some lovely friends, and from ikea, Laura Ashley, and Cath Kidson online ( I er only ordered the samples too chickenshit to order real fabric)

Monday, 1 December 2008

Scrap Ornaments


little scrap ornaments
As you know I have been experimenting with learning to sew, I am now in possession of a dinky little sewing machine and a box full of scraps to play with. Its not all been easy, its difficult for me to follow directions well, as in other peoples patterns though it doesn't stop me from loving to read a good tutorial. I think its just the way my brain works.

I'm left handed and have struggled all my life to understand the right handed world beyond teaching myself to cut using the red handled scissors in school. (The green Lefty scissors were always a.) broken b.) rusty or c.) stuck together with supposedly kid safe glue). I like to look at things take them apart in my head then try to see if I can do it for myself. Sometimes it works and sometimes it hits an iceberg or several before I go my own way.


just hanging around

This Christmas I am really trying to stick with the handmade theme, I normally do a lot of baking for friends and family, and this year I wanted to do more. So I have been experimenting with my box of scraps to make these cute little ornaments. The scraps are all fabric samples from Laura Ashley that either my Mother in Law gave me or I have asked for on trips to Laura Ashley. I have more to make and more scraps to work with, I'm hoping to give some ornaments away as gifts, and gift tags, and will probably play about with adding a few buttons, and possibly drawing or painting on some scraps of natural linen I have been hiding.
the little scrap oranments are really easy to make, if you would like a tutorial I would be happy to write one up and list what materials I used.. aside from the scraps of fabric of course!