Wednesday 24 December 2008
Merry Christmas

Saturday 20 December 2008
lavender and rice warm bags
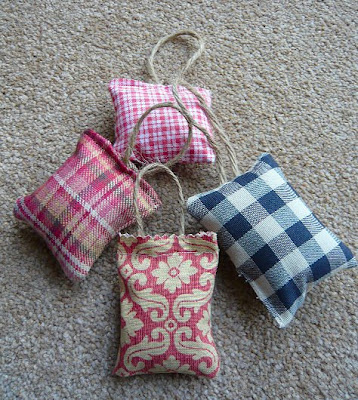
I would probably call them heat-y bags as that's what we call H's warming wheat bag. I made these with a bit of "help" from H, for his great-grandmother and for his grandma too... they are made from some Laura Ashley fabric that any grandmother or great-grandmother would love. Probably a little wonky in places due to my less than exemplary sewing skills but they look nice and smell like lovely. They can be warmed in the microwave or popped in a bag and chilled in the freezer.
They were quite simple to make even with my sewing skills and that makes two more presents to pop on the ever growing pile of wrapping I have to do later. After I have been shopping later today to get all the things I have been too sickly to sort out during the week. Luckily we are all on the mend so its going to be very busy these next few days before Christmas. If I have a chance I will blog a few more Christmas-y recipes and maybe a few more crafty things too before I put away my scissors, my pliers, my pens and just wear an apron and carry a wooden spoon in hand constantly. Tis the season after all...
Tuesday 16 December 2008
Luxury Granola (aka reindeer food) recipe
Place in the oven for 25 minutes or until golden brown.
Every 5 minutes you will need to open the oven door and stir the granola mixture.
--------------------------------------------------------------------------
A little help for those who don't use cups as measurements. Oh and for the record I just use normal everyday teaspoon and tablespoons for measurements, less hassle than attempting to locate the measuring ones. Which I think have migrated to H's toy box.
U.S. to Metric Conversion Table
1/5 teaspoon = 1 ml
1 teaspoon = 5 ml
1 tablespoon = 15 ml
1 fluid oz. = 30 ml
1/5 cup = 50 ml
1/4 cup = 60 ml
1/2 cup = 120 ml
1 cup = 240 ml
2 cups (1 pint) = 470 ml
4 cups (1 quart) = .95 liter
4 quarts (1 gal.) = 3.8 liters
Cooks Notes: The recipe is mine based on several granola recipes that I found on the Internet and was quite disgusted by the amount of salt, and vegtable oil used in them. In the end I ignored the recipes I had found and experimented with what I thought of as Christmas-y tastes: dried cranberries, cinnamon and brown sugar.
Saturday 13 December 2008
cupcake snowman recipe

ingredients:
cupcakes:
Ingredients:
2 1/2 cups self raising flour
1 ½ cup caster (white) sugar
1 teaspoon baking powder
2 eggs
1 teaspoon salt
1/2 cup butter (softened)
1 cup milk
3 teaspoon vanilla extract
Preheat the oven to 350 degrees F (180 C).
Grease 12 cupcake cups or line with paper muffin liners. (recipe makes 24 cupcakes (not fairycake size, muffin tin size.)
Sift the flour, baking powder, and salt into a medium bowl and set aside.In a small bowl mix the milk and the vanilla.
In a large bowl cream butter and sugar until fluffy.
add half the flour and mix well. Add half the milk and vanilla mixture.
Add eggs, one at a time mixing well. slowly add in the remainder of the dry mixture.
Add the last of the milk and vanilla.
spoon the batter into the cups and bake for 15 to 20 minutes, until the cake springs back when touched.
Remove from oven and let cool for about 10 minutes, then turn out of pan and onto a rack to finish cooling completely.
Vanilla Cream Cheese Frosting
ingredients:
1 (8-ounce) package cream cheese, softened
1/2 cup unsalted butter (softened)
1-1/2 cups powdered (icing) sugar
1-2 teaspoons vanilla extract (flavouring)
Place the cream cheese, butter, and vanilla in a bowl and slowly add in the powdered (icing) sugar as you mix. Blend until smooth.
decoration:
1 large bag of plain m&ms
1 industrious child to separate the m&ms ( you only need the brown and orange ones so bribary is easy)
sweetened and tenderized coconut
1 bag plain chocolate chips
assembly:
place the sweet coconut in a bowl
ice a cupcake with the vanilla icing and gently dip the cupcake into the coconut.
use the brown m&ms for the eyes and the orange ones for the nose, and chocolate chip (coal) for the snowman's smile. Its a fun job that the kids can help you with, especially seperating out the m&m colours, as H quite happily sat for an unheard of 10 minutes sperating out all the m&ms and was quite happy to steal a few.
alternatively you could use other orange sweets for the snowman's nose or colour some marzipan orange and roll flat and cut small triangles (carrots) or roll into small carrot shapes.
 cooks notes: I made two batches 48 cupcakes to sell after H's school Christmas Concert. every single cupcake sold at a £1 each, M assures me they were very nice I never got one though I may have made myself just the teensiest bit sickly "tasting" the icing....and cake batter... I also made 2 trays of brownies (recipe soon) which all sold out as well, so I was quite pleased that even if my jewellery wasn't selling my cakes were appriciated and raised some money for H's school.
Thursday 11 December 2008
illustrated ornaments

Hopefully M isn't snooping on my blog, he doesn't visit very often anyway so I should be OK to blog this little coffee cup ornament that I made for him.. its only going to be a glorified tag on his present but still its nice to keep some secrets for Christmas.
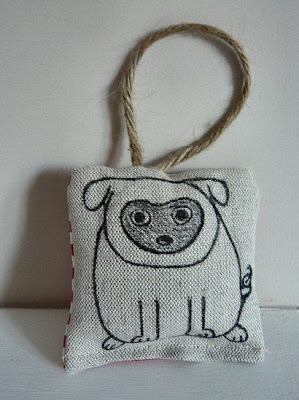
I posted the pug ornament off to my parents yesterday so I doubt it will make it to Idaho before Christmas but one can hope. all set for Christmas? er no not really but I'm trying to be.. though I think I'm getting a cold which is just what I need in the two weeks before Christmas.
 an owl in a tree
This little owl in a tree is my favourite, its from a quick sketch I did while at a abysmal fair after I had exhausted my supply of beads to make more jewellery and it was better to draw something than to sit twiddling my thumbs. I best get going now I have brownies in the oven and they need checking then I have snowman cupcakes to make... I may blog the recipes later in the week!
Monday 8 December 2008
Its beginning to look alot like...
 scrap fabric ornament
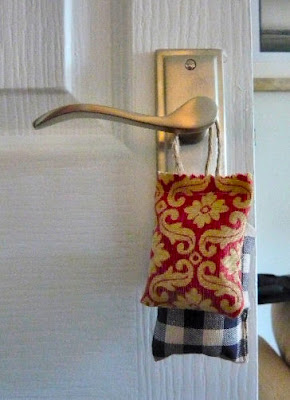
We went to a birthday party for H's friend over the weekend as well, and I made the little Lamb ornament to go with a Christmas card I sent along with a birthday present. My friend's last name is Lamb so I thought it would be perfect to doodle a lamb onto one of the fabric ornaments I have been working on. And now apparently need to make more as I dare not take them off the doors or there will be serious upset from the boy.
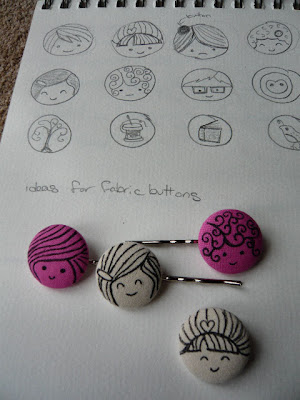
 pins and original doodles
Thursday 4 December 2008
bad owl

Wednesday 3 December 2008
Scrap Ornament Tutorial
 scraps and samples collected from various places Ikea, and Laura Ashley
 ahem
ahem materials:
 step 2: Put the fabrics together facing each other and place the twine/ribbon between them. You may want to hold the fabric and twine in place with a needle or two. Sew along the left side the top (careful of the twine) and along the right side.
  Step 3: carefully turn right side out, pressing out the corners, with a chopstick or knitting needle. Fill the ornament with poly fill (if you wish you can add dried lavender, or cinnamon to make the ornaments smell lovely.
  step 4: Fold the ends of the material in and hold them with more pins and sew along the bottom of the ornament.
Its not a complicated tutorial because my sewing skills are decidedly advanced, there are a lot of different techniques you could use, you could sew an ornament with the right side out and then crimp along the edges with pinking shears (I don't have any) add buttons, or embroidery. The owl and the quail I hand drew with a fabric pen, ironed it to set the ink and I think they look quite special. I will be giving these out as Christmas gifts as well as decorating our Christmas tree with them.
If you have any questions I will try my best to answer them, and if not I will point you in the direction of someone who can. Its a fun way to use up little scraps that might otherwise sit about in your scrap box feeling unloved and cross breeding with rogue dust bunnies. My scraps and samples have come from some lovely friends, and from ikea, Laura Ashley, and Cath Kidson online ( I er only ordered the samples too chickenshit to order real fabric)
Monday 1 December 2008
Scrap Ornaments

I'm left handed and have struggled all my life to understand the right handed world beyond teaching myself to cut using the red handled scissors in school. (The green Lefty scissors were always a.) broken b.) rusty or c.) stuck together with supposedly kid safe glue). I like to look at things take them apart in my head then try to see if I can do it for myself. Sometimes it works and sometimes it hits an iceberg or several before I go my own way.
 just hanging around
This Christmas I am really trying to stick with the handmade theme, I normally do a lot of baking for friends and family, and this year I wanted to do more. So I have been experimenting with my box of scraps to make these cute little ornaments. The scraps are all fabric samples from Laura Ashley that either my Mother in Law gave me or I have asked for on trips to Laura Ashley. I have more to make and more scraps to work with, I'm hoping to give some ornaments away as gifts, and gift tags, and will probably play about with adding a few buttons, and possibly drawing or painting on some scraps of natural linen I have been hiding.


