Showing posts with label tutorial. Show all posts

Thursday, 7 October 2010

Spider Jar

Spider Jar
spiders caught in a jar

a Mini Halloween Tutorial

ingredients:
1x medium jar
a small amount of fake spider webbing
2x plastic spiders

instructions:

*Turn the jar upside down and place the webbing so that it goes up half the jar.

*Place your spiders on the webbing and then screw the lid back on the jar. You can add a small stick or some autumn leaves to make the jar more effective.

a super simple little project that kids of any age will love to do.. it costs pennies to make and recycles a jar. Harrison took great glee in showing the jar to Matt when he got home.

Friday, 1 October 2010

halloween pegs tutorial

halloween pegs
Ingredients:
wooden clothes pegs (or the mini craft pegs)
twine
acrylic paint (orange and black)
water
paintbrushes
vintage buttons
glue

directions:
1. put a dab of paint onto a small plate and add a little water to it.

2. paint the pegs with the watery paint so that the paint soaks into the wood of the pegs.

3. let the pegs dry (you may need to wipe them down with a cloth or tissue to get a more rustic effect.

4. dab glue onto the back of a vintage button and glue it to your peg.

5. clip your pegs to the twine or anywhere you please. Or give them away as a little gift.


cook's note: its a simple project, a fun thing for kids to help do, great for holding cards, decorations or scraps of fabric. I have misplaces the craft magnets I bought ages ago but if I do find them I plan to stick them to the back of one of the pegs to make a magnetic clip.

Wednesday, 28 April 2010

upcycled tshirt project/book bag

Simple little project with very little sewing, a small book bag or knitting/crocheting project bag made from one of H's old t-shirts.

the project is really as easy as one, two, three...

t-shirt project bag
ingredients:
-1 old tshirt (I used a toddler sized shirt age 3-4)
-needle and thread (or a sewing machine because my had sewing is horrific)
-scissors

1. pick out a loved t-shirt that is worse for wear. Turn it inside out, pin along the bottom seem.

2. sew along the bottom of the shirt.

3. turn the shirt right side out.. cut off the sleeves and then cut off the neck of the shirt. Tug the t-shirt material along the arm and neck holes so that the fabric curls over and fill with whatever you want.


The before picture of H's t-shirt, I have no idea where it came from the size is age 3-4 and there was very little wear on the shirt (meaning his head grew too fat for it and he had to go the the next size up).

Its a super simple project and can be done with any size shirt, use a large shirt as a shopping carrier bag (you could probably sew a small pouch out of a large sleeve to fold the shirt bag into to store in your handbag when needed). I think using kids t-shirts would make great lunch/snack bags and also a great way for kids to collect treasures when you go on walks or to the beach, as they can be easily folded up to store them and can be made from those favourite shirts that they can no longer wear.


I have seen similar t-shirt material bags in shops and if you google it you will probably find two dozen or more tutorials (I watched a youtube clip of a woman duck taping the inside of a t-shirt and using staples instead of sewing, whatever floats your boat really).

My sewing machine hates me so I need to re-sew the bottom of my bag though I carried a book and my phone around all day yesterday and it held up very well anyway. I desperately need a bigger sewing machine, nothing horribly fancy but something that will sew a few layers together without having a hissy fit at me. M machine is practically a tinker toy, and though it has been a great learning tool I could do with the next step up so I can continue learning to sew and make the things I wish to make (like more patchwork squares so I can make Katy help me make a quilt).

If I can get my sewing machine to behave I think I will make some shopping carrier bags with a few of my favourite shirts that have died a death (holes and stains) and add some doilies and buttons!

Thursday, 25 March 2010

button jewellery a mini tutorial

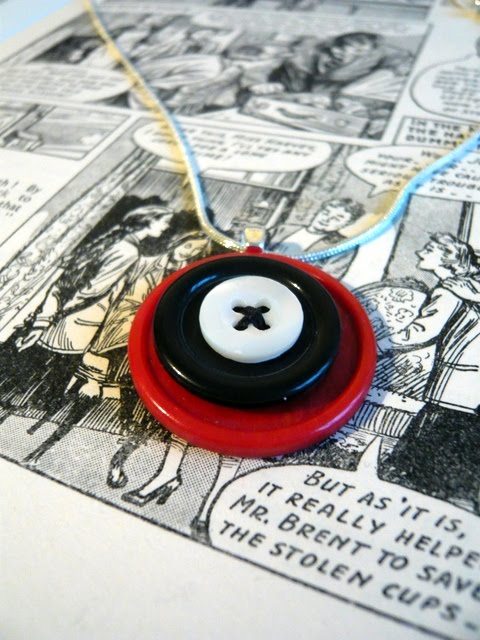
the Red Queen Pendant
ingredients:

vintage buttons
craft glue
glue on bails (or small pin backs)
needle and thread thread
chain or necklace

Instructions:

step 1: gather materials together and stack two or three buttons together until you find a combination that you love.

step 2: thread the needle and sew your stack of buttons together (alternatively you can glue them on top of each other, but I like the look of the thread keeping the buttons together)

step 3: decide where the bail/pin back will go on the back of the stack and place a few drops of glue on the back of the button and on the flat part of the pendant bail. Leave for a few seconds then stick the bail/pin back to the button stack.

step 4: let the glue dry then string the button pendant on a chain or pin the button pin to anything!

crafter's notes: I know it is only a super simple tutorial but it is fun and funky, and I will happily be wearing the red, black, and mother of pearl button pendant when I go out today. The pin below was my first attempt with a large renegade chartreuse button that had hidden in one of my button jam jars. If anyone wants it I will gladly give it away as chartreuse and I are no friends (the colour makes me look ill or possibly just a very lively zombie).


Chartreuse it is

Wednesday, 23 December 2009

a little faery dust

faery, faerie, fairy.... whatever
Ingredients:
glitter
mini jam jars (the kind that you get when you order a scone with jam and cream or found at a hotel breakfast bar)
a handful of buttons
a few scraps of fabric
twine (a hair tie or rubber band will work too)
small piece of card
alphabet stamps
ink
scissors
1 x child

Instructions:
*Make sure the jam jar is clean (glitter and jam not so great actually). Fill the jam jar with glitter and put the lid on tightly (you can tape it down if you hate glitter as much as I do)

*Use scissors (or pinking shears) to cut the fabric into a circle to cover the lid of the jar. (I used a slightly larger jar as a template)

*Tie the fabric around the jar using the twine, (hair tie, rubber band).

*Cut a small piece of card into a tag shape and let your child stamp faery dust, magic dust, glitter (ignore the temper tantrum that follows when you say to said child that they have missed a letter,blurred the ink, or no they cannot have the glitter back it is it the fairy dust pot.....then sit and re-stamp another piece of card because you are fussy and anal about crafts and the letters must be perfect)

*Have a mini breakdown when said child stomps off in a rage, leaving you threatening to cancel Christmas and call Santa .....after eating all the chocolate in the advent calender.

*Thread some buttons onto a piece of thread and tie around the jar.

*Add the tag and there you go one lovely little faerie dust decoration/gift (and a way to hide the evil glitter in plain sight. because there is nothing more evil than a child with a bottle of glue and a pot of glitter)

*send annoying demonic offspring to help Daddy while you have a cup of coffee (or something stronger) and steal the chocolate meant for Christmas Day.

(alternatively you could fill them with edible glitter, but I couldn't find any round these parts)


if only it made kids be good, calm, and comatose

Wednesday, 1 July 2009

Cake Stand Tutorial

cake stand

Cake Stand Tutorial

What You Need:

* a pretty plate
* an old candlestick, vase (small and sturdy with a wide base is best), large espresso shot glass, or a thick glass
* super glue, or craft glue ( I used superglue as I never seem to have much luck with craft glue)
* tape (masking, cella or craft tape)

Directions:

1. Choose your plate and base, and make sure that the plate balances on the candlestick (or other base)

2. Clean and Dry both the plate and the candlestick.

3. Find the centre of the back of the plate and mark it with a marker pen.

4. Apply superglue to the candlestick and the bottom of the plate.

5. Firmly but gently press the candlestick onto the bottom of the plate.

6. It may be necessary to apply tape across the candlestick while the glue dries.

7. Once dry (over night or a few hours depending on the glue used) use as a display item or cake stand. Wash gently depending on the durability of the glue used.


Due to the severe lack of cake in the house I was forced to pile the plate with delicious looking jewellery instead. There will be Cake tomorrow, I promise you, my faithful readers, that. Or at least coconut candy to adorn the cake stand. I found the plate at Heanor Antiques Centre, its not an antique, its from 1996, commemorating the 150th anniversary of the Bronte sisters poetry. I'm not a Bronte fan, but I am obsessed with writing on things, some of you may have guessed this with the cooing I have done over fabric with writing on, the book page illustrations I create, and the random drabbles and writing I do.

Thursday, 11 June 2009

Knitting Needle Bangles

vintage red knitting needle bangles

I wasn't meant to be making these today, I had the lofty idea that I would play the perfect housewife and made the house a perfectly shiny and lovely place, with everything dusted and washed and lemon scented. Like that was ever going to really happen, although I did bake accidental brownies last night. I had cracked eggs that needed using. Besides baking is a different sort of craft, to me cooking and baking can either be hard work or zen like, last night it was zen like, and then there was a bowl of ooey gooey brownie batter....mmmmmm....where was I? oh yes knitting needle bangles.

Why did I make knitting needle bangles? because Megan did and she inspire me to, seeing as I was moving some winter wear up to the attic and I just happened to "knock over" my box of yarn and knitting needles and the called out to me to turn them into jewellery. What's a girl to do? why listen of course. I had read about making knitting needle bangles a year or to ago and never got around to it until I saw Megan's and thought why not. But I am adamant that Megan is a bad crafty influence on me... next she will have me scouring the shops for vintage buttons!

There are several tutorials out there if you google to tell you how to make knitting needle bangles, but its basically very simple, the hardest part is finding nice vintage knitting needles.


How to make knitting needle bangles


you will need:
vintage plastic knitting needles
a pan
tongs (or tweezers)
a tin or jar (measuring roughly 8" around)
gloves (optional if you have Teflon hands like mine)

1. boil a pot of water.

2. place your knitting needle in the pot, Its a bit like cooking spaghetti, push the knitting needle into the water a bit at a time until it is fully submerged. ( soften for 5 to 10 minutes in the hot water)

3. Use the tongs to remove the knitting needle from the boiling water and wrap the needle around a can or jar. I used my bare fingers but you can use kitchen gloves to wrap the needle around.

4. plunge the can and bangle into cold water to set.

5. if the bangle isn't quite right, pop it back into the boiling water to reshape.


easy as 1...2...3...4...5

Wednesday, 25 March 2009

Knitted Java Jacket Pattern

Owlish Java Jacket (the button was made by Sam)
materials

1 paper coffee cup for measurement
needles: US 8 (5.0mm)
yarn: 10 ply (I used Noro Kureyon I hd left over)
1 (owl or other vintage button)
yarn needle
needle and thread


Instructions

Cast on 15 stitches.

1st row: knit

repeat until the piece of knitting wraps around the cup tightly

bind off leaving a tail of yarn 10 in long.

sew the ends together using the tail end of yarn.

Then sew on your button or beads or any other embellishments you wish.

Take it to the coffee shop and slide it on your coffee cup.

Drink copious amounts of coffee/tea.

------------------------------------------------------

Its a quick, simple, and fun project that uses up any oddments of yarn that are hanging around your knitting stash. It can easily led its self to more complicated knitting methods, cables, lace, or even bobbles.

I'm sure there are plenty of other java jacket/coffee cozy patterns out there, crocheted or knit in the round if you have a good search. I'm a leftie and as such I tend to get muddled when reading any sort of pattern, but if I go my own way and make things up for simple items things seem to work out quite well. I do intend to teach myself to crotchet by making various java jackets and simple items.

Java jackets protect your hands from hot or icy drinks, feels pleasing to the touch and is the perfect environmental alternative to cardboard coffee sleeves.The sleeve will stretch to fit most paper coffee cups and is small enough to carry in your purse or pocket. Or can be worn on your wrist to the coffee shop, although M says they should be gold in colour and wear two of them like Wonder Woman. Maybe next time.

* more pictures can be found here from the first time I posted this tutorial/pattern. I started this java jacket awhile ago and kept forgetting about it until the other day when I dug out the owl button that Sam sent to me, its a perfect match I think.

Thursday, 22 January 2009

Wolf and Apple Tree bookmark

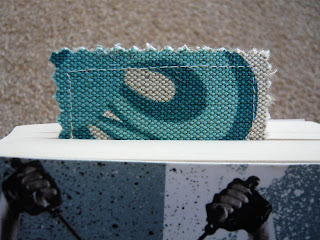
sorry the photo is such bad quality the light has been nonexistent today, until about 30 seconds ago anyway. Its another small bookmark similar to the one I made in my mini bookmark tutorial. Its made from a small piece of the lovely Red Riding Hood fabric Selena sent me in the Fairy Tale Swap last summer, with some cotton/linen blend fabric on the back (which I forgot to take a picture of). Its cute though and currently marking a page in a craft magazine.

Now I have an Ikea storage unit to build, and wade through the horrible disaster zone that is H's closet. Wish me luck or call for help if I don't resurface for a day or two.

Thursday, 8 January 2009

mini bookmark tutorial

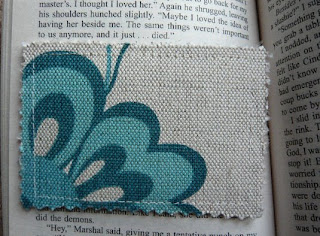
gift card sized bookmark

An explanation first, in case you think I might be turning mad. I love gift cards, not necessarily to be given them, although there is nothing nicer than having a fully loaded card for a bookstore in my hot little hands. I mean I collect them, every time we go to the states, I'm sure as a family we must have boxes full of empty gift cards, I love them they make perfect bookmarks for paperbacks as you can not only mark the page but mark the sentence or paragraph you left off at. But the cards I have mean something to me, from my favourite places and shops. I have ones from the Flying Goat coffee shop in Santa Rosa, The First Starbucks in Seattle, Bloomingdale's in San Francisco(one of which I gave to Katy, as she understands), and countless Old Navy and Target cards.
I have even converted M and H. H adores having cards for all his favourite places in the states, mainly IHOP, Old Navy, and Starbucks, and M has a very special Starbucks personalized card that I had a friend order for me to give M for his birthday last year, he keeps it in his wallet all the time even though there is no money left on it. As I love the size of the cards as bookmarks I thought it would be fun to make a fabric bookmark the same size as a gift card with a few scraps of fabric I have in my little fabric scrap box, a quick project to use up any small scraps of fabric that are too good to throw away.


mini bookmark tutorial

materials:

fabric scraps
interfacing
needle and thread or sewing machine
pinking shears


1. Start by cutting 2 small pieces of fabric a 1/4 inch larger than a gift/credit card.

2. Cut 2 pieces of interfacing the same size as the fabric. And following the instructions iron the interfacing to the back of both pieces of fabric.


3. Place pieces together, with the right sides facing out, and stitch about a quarter of an inch away from edge all the way around the fabric.
4. Pink along the edge of the bookmark with your pinking shears.

5. Mark your place in your book with your new bookmark.
alternatively you could add ribbon or embroidered details to your bookmark. I hope you found a little inspiration from this quick craft idea.

(don't forget to sign up for the Owl Swap if you are intrested)

Wednesday, 3 December 2008

Scrap Ornament Tutorial

scraps and samples collected from various places Ikea, and Laura Ashley


ahem


materials:
an assortment of fabric scraps
garden twine or ribbon
needle and thread or sewing machine
poly-fil
(buttons, fabric pen, beads, paints optional)


step 1:
you will need two pieces of fabric the same size ( I didn't measure anything I jsut went by what little scraps I had to hand) and a small piece of twine/ribbon. I used gardening twine from a garden centre but you may wish to make fancier ornaments than me.

step 2: Put the fabrics together facing each other and place the twine/ribbon between them. You may want to hold the fabric and twine in place with a needle or two. Sew along the left side the top (careful of the twine) and along the right side.
Step 3: carefully turn right side out, pressing out the corners, with a chopstick or knitting needle. Fill the ornament with poly fill (if you wish you can add dried lavender, or cinnamon to make the ornaments smell lovely.

step 4: Fold the ends of the material in and hold them with more pins and sew along the bottom of the ornament.

Its not a complicated tutorial because my sewing skills are decidedly advanced, there are a lot of different techniques you could use, you could sew an ornament with the right side out and then crimp along the edges with pinking shears (I don't have any) add buttons, or embroidery. The owl and the quail I hand drew with a fabric pen, ironed it to set the ink and I think they look quite special. I will be giving these out as Christmas gifts as well as decorating our Christmas tree with them.

If you have any questions I will try my best to answer them, and if not I will point you in the direction of someone who can. Its a fun way to use up little scraps that might otherwise sit about in your scrap box feeling unloved and cross breeding with rogue dust bunnies. My scraps and samples have come from some lovely friends, and from ikea, Laura Ashley, and Cath Kidson online ( I er only ordered the samples too chickenshit to order real fabric)

Wednesday, 19 November 2008

Tile Magnet Tutorial

Stone tile fridge magnets

Materials
5cm x 5cm stone tiles (they come in sheets from your local tile or DIY shop)
acrylic paints
magnets (as many as you have tiles)
1x tube superglue (or all purpose crafting glue)
1x can varnish spray


Step one: remove a tile from the sheet of backing it is stuck to. Clean and leave to dry out.


Step two: sketching your design. I sketched directly onto the tile, but you can draw your design onto some tracing paper and transfer it to your tile. Alternatively if you don’t draw or sketch you can used rubber stamps to stamp on a design.


Step three: paint your design using acrylic paints. I used them because I normally use acrylics in my art, they dry quickly and are pretty durable.


Step four: I sprayed my tiles with an acrylic varnish (2 coats)


Step 5: glue the magnet to the back of the tile. (the magnets I bought came with adhesive on the back but it was not nearly strong enough to hold the tile up. I know because I tried it and the tiles clattered down to the counter top)


I'm really happy with how they turned out, and seeing as there are several more sheets of tiles in the garage I plan to make some more tiles up as Christmas presents. I may even rope H into helping by getting him to make some Jelly Bean People magnets. I hope you find this tutorial fun and helpful.
p.s. if you look closely at the last picture you will see that they are indeed my kitchen tile leftovers. The noticeboard is a metal topped shelf from Ikea.

Friday, 1 August 2008

Java Jacket Tutorial

java jacket

I love coffee and I love having my own little java jacket to put around my drink much to M's amusement so I thought I would write up a simple pattern and share it with you. Please be kind this is my very first pattern/tutorial.

materials

1 paper coffee cup for measurement
needles: US 8 (5.0mm)
yarn: 10 ply (I used Debbie Bliss Donegal Luxury Tweed in purple but any yarn will do)
2 vintage buttons
yarn needle
needle and thread


Instructions

Cast on 15 stitches.

1st row: knit

repeat until the piece of knitting wraps around the cup tightly

bind off leaving a tail of yarn 10 in long.

sew the ends together using the tail end of yarn.

Then sew on vintage buttons or beads or any other embellishments you wish.

Take it to the coffee shop and slide it on your coffee cup.

Drink copious amounts of coffee/tea.

------------------------------------------------------

Its a quick, simple, and fun project that uses up any oddments of yarn that are hanging around your knitting stash. It can easily led its self to more complicated knitting methods, cables, lace, or even bobbles.

I'm sure there are plenty of other java jacket/coffee cozy patterns out there, crocheted or knit in the round if you have a good search. I'm a leftie and as such I tend to get muddled when reading any sort of pattern, but if I go my own way and make things up for simple items things seem to work out quite well. I do intend to teach myself to crotchet by making various java jackets and simple items.

Java jackets protect your hands from hot or icy drinks, feels pleasing to the touch and is the perfect environmental alternative to cardboard coffee sleeves.The sleeve will stretch to fit most paper coffee cups and is small enough to carry in your purse or pocket. Or can be worn on your wrist to the coffee shop, although M says they should be gold in colour and wear two of them like Wonder Woman. Maybe next time.